Cut Through the Clutter - Learn AWS in 1 article !
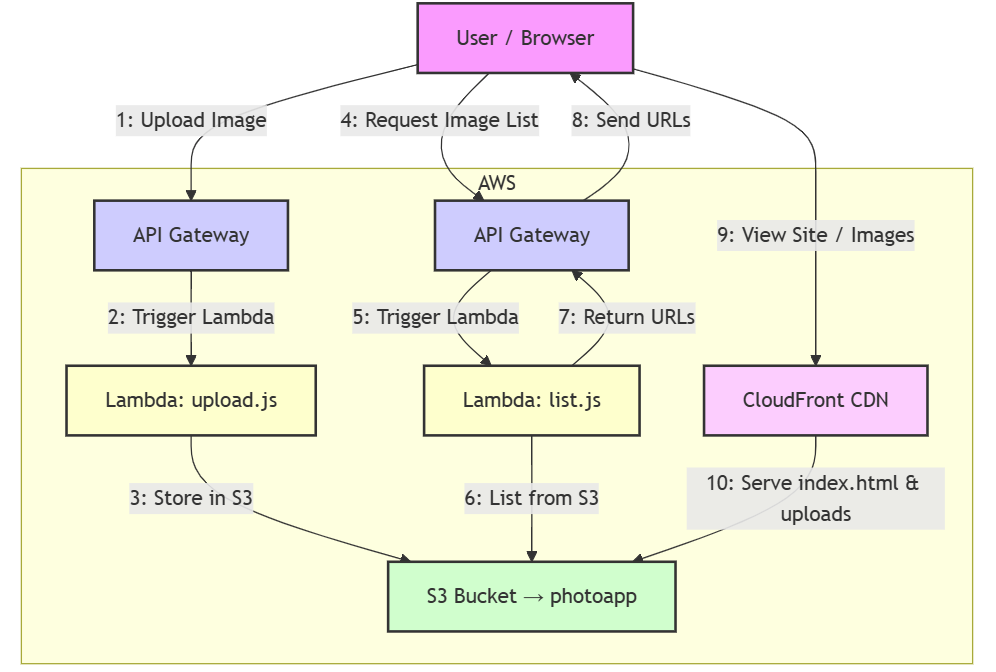
Let’s skip the jargon and jump straight into action! In this guide, you’ll build a serverless image upload and viewing app using AWS. We learn all the essentials of AWS with this 1 application -
- Set up an AWS account
- Create IAM roles for secure access
- Store images in S3
- Use Lambda functions to handle uploads and retrieval
- Connect everything with API Gateway
- Deploy your frontend using S3 and CloudFront
Step 1: Setting Up Your AWS Account
Head over to aws.amazon.com and sign up for a new account. Start with the Free Tier, which gives you enough resources to test and build small projects without incurring a bill.
Setting Up AWS CLI (Optional)
The AWS CLI allows you to interact with AWS from the terminal. This step is optional because you can manage everything via the AWS dashboard, but it’s useful for automation.
- Install the AWS CLI.
- Run aws configure to set it up with your Access Key, Secret Key, region, and output format.
aws configure
Now you can use commands like:
aws s3 ls           # List all S3 buckets
aws ec2 describe-instances # List all EC2 instances
Step 2: IAM – Secure Access
IAM (Identity and Access Management) allows you to control who can access what in AWS. For this app, we’ll focus on creating secure access to our services.
Create a Policy for Lambda
Before you question what lambda is, it is also a service containing our backend logic ( more on it later ).
Go to IAM > Roles > Create Role
-
Use AWS Lambda as the trusted entity
-
Attach a policy
IAM Policy (for S3 access):
{ "Version": "2012-10-17", "Statement": [ { "Effect": "Allow", "Action": ["s3:PutObject", "s3:ListBucket"], "Resource": [ "arn:aws:s3:::photoapp/*", // We will create this bucket next ! "arn:aws:s3:::photoapp" ] } ] } -
Trust policy: allow Lambda to assume the role
-
Name it something like lambda-s3-access
Step 3: Create an S3 Bucket
- Go to S3 > Create Bucket
- Name the bucket (e.g., photoapp)
- Disable public access block (CloudFront will handle access later)
- Enable static website hosting ( index document as index.html )
Later, we’ll serve everything (images and frontend) through CloudFront.
Step 4: Add Lambda Functions
Lambda lets you run code(here, backend logic) without managing servers. We’ll write two Lambda functions for this app:
- upload.js: Uploads an image (base64 encoded) to S3
- list.js: Lists the URLs of uploaded images
upload.js (Uploads image to S3)
// /lambda/upload.js
const AWS = require('aws-sdk');
const s3 = new AWS.S3();

exports.handler = async (event) => {
  try {
    const body = JSON.parse(event.body);
    const buffer = Buffer.from(body.image, 'base64');

    const result = await s3.upload({
      Bucket: '*photoapp*',
      Key: `uploads/${Date.now()}.jpg`,
      Body: buffer,
      ContentType: 'image/jpeg',
    }).promise();

    return {
      statusCode: 200,
      body: JSON.stringify({ url: result.Location }),
    };
  } catch (error) {
    console.error(error);
    return {
      statusCode: 500,
      body: JSON.stringify({ error: 'Failed to upload image' }),
    };
  }
};
list.js (Lists image keys)
const AWS = require('aws-sdk');
const s3 = new AWS.S3();

exports.handler = async () => {
  try {
    const data = await s3.listObjectsV2({
      Bucket: 'your-image-app-bucket',
      Prefix: 'uploads/',
    }).promise();

    const keys = data.Contents.map(obj => obj.Key);

    return {
      statusCode: 200,
      body: JSON.stringify(keys),
    };
  } catch (err) {
    return {
      statusCode: 500,
      body: JSON.stringify({ error: 'List failed' }),
    };
  }
};
Attach the lambda-s3-access IAM role created earlier to both.
Step 5: Connect Lambda to API Gateway
API Gateway exposes your Lambda functions as REST API endpoints.
- Go to API Gateway > Create API
- Choose HTTP API
- Add routes:
- POST /upload → Lambda upload.js function
- GET /images → Lambda list.js function
- Deploy and note the API URL (you’ll use this in frontend)
Step 6: Set Up CloudFront (CDN)
Cloudfront is a CDN, edge servers located close to users are used to deliver the content faster. Hence can speed up distribution of your static and dynamic web content, such as .html, .css, .js, and image files, to your users.
Create a CloudFront distribution with following -
- Keep origin as your S3 bucket website url
- Cache policy to be optimized for static
- Behaviours to allow GET/HEAD on /uploads/
- (Optional: add a second behavior to point /index.html to S3)
- You’ll get a global URL (you’ll use this in frontend)
Step 7: Build the Frontend
This is what you frontend would look like -
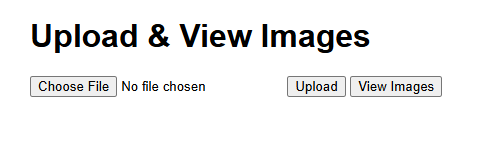
Copy this code in index.html in your local -
<!DOCTYPE html>
<html>
<head>
  <title>Image Uploader</title>
  <style>
    body { font-family: sans-serif; margin: 2em; }
    img { width: 150px; margin: 5px; }
  </style>
</head>
<body>
  <h1>Upload & View Images</h1>

  <input type="file" id="fileInput" />
  <button onclick="upload()">Upload</button>
  <button onclick="loadImages()">View Images</button>

  <div id="gallery"></div>

  <script>
    const API_BASE = 'https://your-api-id.execute-api.YOUR-REGION.amazonaws.com';
    const CLOUD_FRONT = 'https://your-cloudfront-id.cloudfront.net';

    function upload() {
      const file = document.getElementById('fileInput').files[0];
      const reader = new FileReader();

      reader.onload = async () => {
        const base64 = reader.result.split(',')[1];

        const res = await fetch(`${API_BASE}/upload`, {
          method: 'POST',
          headers: { 'Content-Type': 'application/json' },
          body: JSON.stringify({ image: base64 }),
        });

        const result = await res.json();
        alert('Uploaded!');
        loadImages();
      };

      reader.readAsDataURL(file);
    }

    async function loadImages() {
      const res = await fetch(`${API_BASE}/images`);
      const keys = await res.json();

      const gallery = document.getElementById('gallery');
      gallery.innerHTML = '';

      keys.forEach(key => {
        const img = document.createElement('img');
        img.src = `${CLOUD_FRONT}/${key}`;
        gallery.appendChild(img);
      });
    }
  </script>
</body>
</html>
Step 8: Deploy Frontend to S3
Now that our app is ready, let’s deploy the frontend to AWS:
- Upload index.html to your existing S3 bucket (same one used for Lambda)
- Under Permissions, allow CloudFront to access index.html and uploads/*
- Your site is now live !
Yayy, You did it !
You’ve now built a fully serverless image upload and viewing app using AWS services. With this guide, you’ve learned how to use AWS services to build a complete app. You can take this foundation and expand it to create more complex applications by using more of such AWS offerings.